In the world of tattooing, the stencil is considered a fundamental element, since it is primarily responsible for ensuring that the final result remains faithful to the design that was previously agreed with the client.
In the article From drawing to stencil, we told you that they exist two ways to make the template: on the one hand, the digital method and, on the other, the manual method.
Choosing to do it digitally is very tempting, and with good reason! Well... It is a useful, practical, and fast alternative, but… it is worth clarifying: no matter how efficient it is, we only recommend it if you are a professional artist.
Why?
Because it is assumed that when a person reaches the professional stage, they have already managed to acquire solid knowledge of drawing, therefore, they can afford to choose an option that simplifies their work.
On the other hand, if you are a beginner, making your templates manually will be the ideal path.
Exercising this method will help you develop and enhance your drawing skills. It will make you pay more attention to details and help you improve your technique in creating designs. But, above all things, it will be ideal to fully understand the tattoo that you will capture on the skin.
Making the stencil manually will keep you prepared for any inconvenience that may arise, both with digital tools and with the design itself at the time of tattooing.
Oh, and a small detail. If you start with this traditional procedure, you will save yourself a good amount of money!
If you still don't have an iPad and a thermocopier, you should know that, to get them, it is necessary to invest a lot... and we all know that in the first years as a tattoo artist, the budget is likely to be limited, so it is important to know how to save and optimize the available resources.
What do you think if we already start with the step by step of the manual method? Let's go for it!
Necessary materials
The materials you need are only three! Let's see:
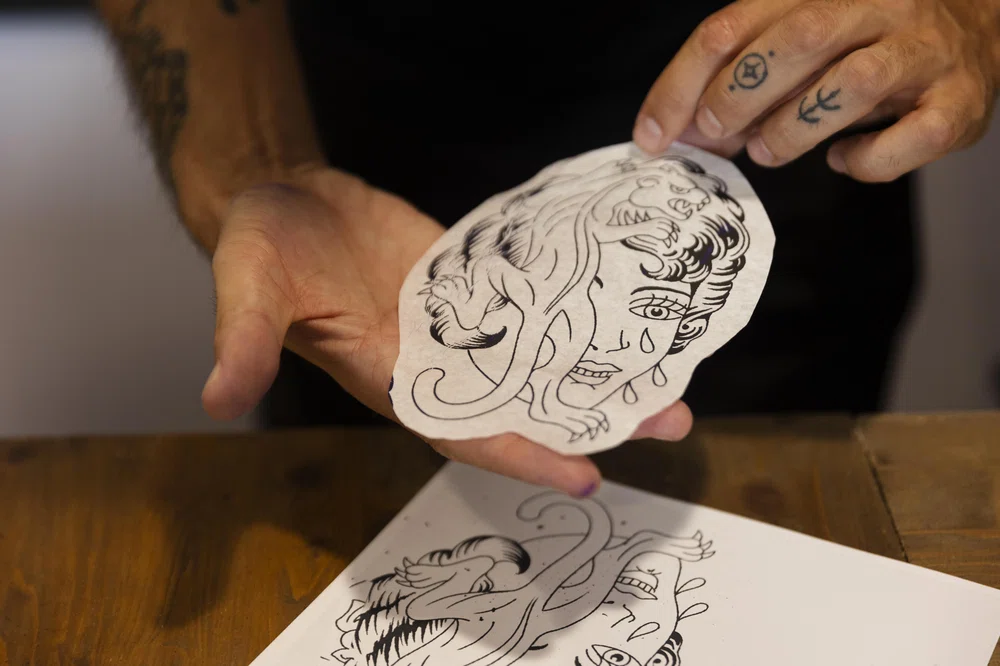
- The design in question, hand drawn or printed.
- A pen, pencil, marker or pen.
- And phectographic paper, which will not be the same as for the thermal copier. This is only to carry out the transfer manually, and you can find it in any dustbin.
Within the manual process, we can find 2 different ways to make the stencil. Of course, we will tell you both! We'll start with:
The classical manual method
The classic manual method is perhaps the one w
ith the most steps, but it allows you to learn more in-depth about the process. Let's see step by step:
- The design that you are going to use should be printed or drawn in mirror mode, since the stencil will transfer to a sheet that is on the opposite side.
If you can't invert your image for whatever reason, then you'll need to do an extra step. We will explain it to you.
- Once you have your design in mirror mode, place it on top of the hectographic paper, ensuring that its inked side makes contact with the other sheet that is included.
Attention! It is recommended that you take a piece of tape and stick the papers together to the table to prevent them from moving and creating a gap in the transfer.
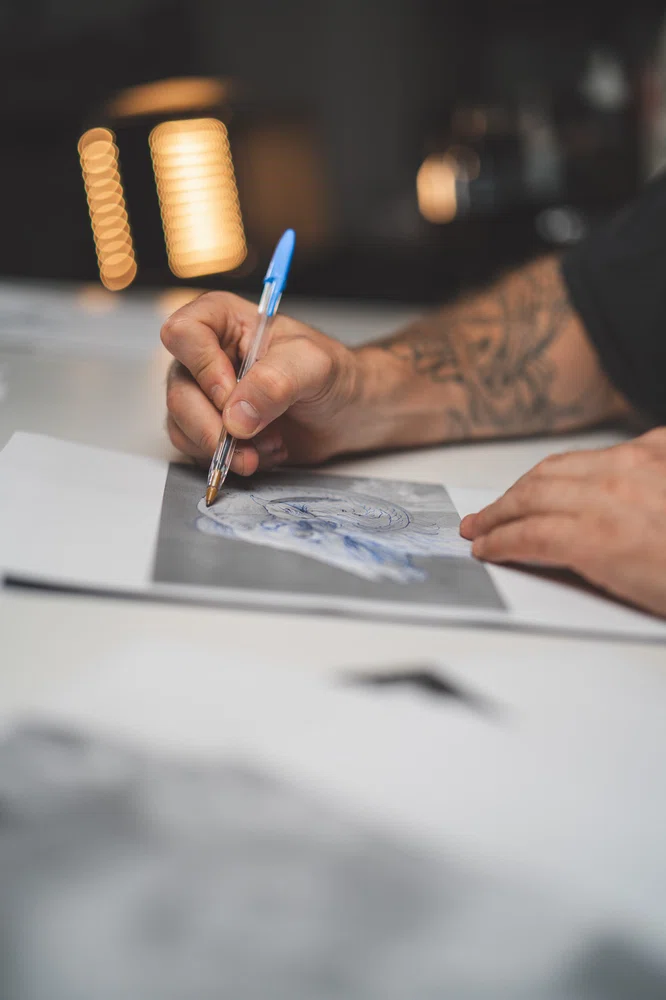
- Trace the lines of your design with a pen. These lines will be transferred simultaneously to the sheet below the hectographic paper.
Because there are two pieces of paper between the final stencil and your pen, you should apply more pressure than when drawing normally.
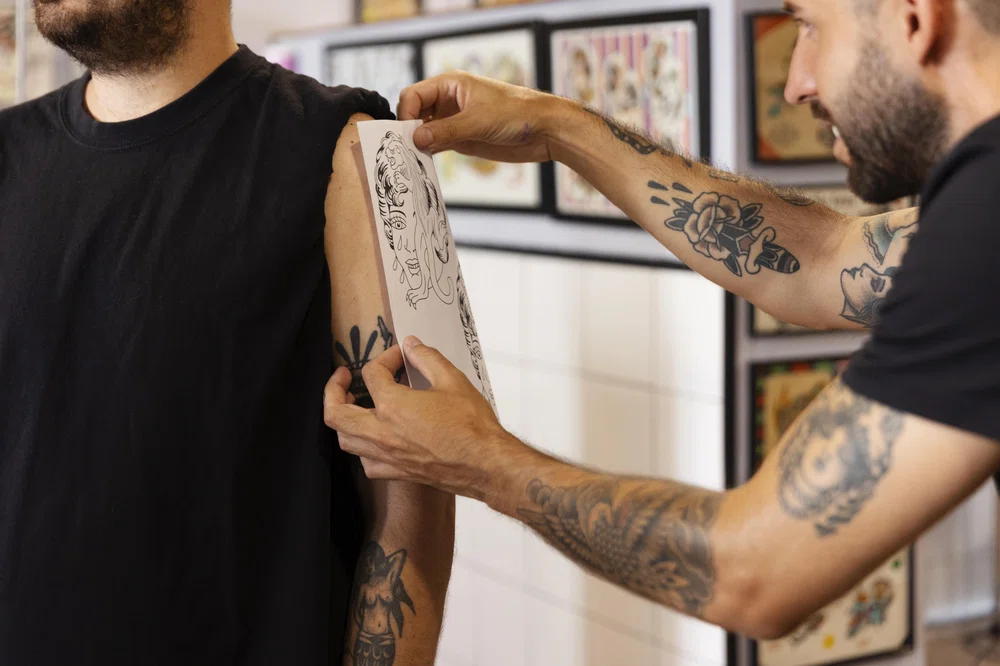
- Once you complete it, the stencil is ready to be used.
If you weren't able to reverse the original image earlier in the process, then as a final step, you'll need to go over the stencil again on the other side, so you can achieve the orientation you're really looking for.
What is the advantage of the classical method?
The most remarkable aspect is that the sheet onto which the design is transferred exhibits remarkable adaptability to the more curved regions of the body that we find somewhat challenging, such as the knee, elbow, or head.
However, it can also be utilized on any other area, although we have an ideal and significantly simplified alternative for such situations. What are we referring to? Our second method, which we shall name:
The fast manual method
Yes, it has a very seductive name... anything fast draws attention, we know. But be careful, from now on we anticipate that it is simply for specific situations.
- You will only use two elements: Hectographic paper, without protectors or additional sheets, and your design printed or drawn on a normal sheet, but which, preferably, must be 80 g/m2.
- As in the previous method, you must place the sheet of your design on top of the hectographic paper, but this time, on the inked side. The other sheet that comes will not be necessary.
- Review the lines And that's it! The copy will be generated on the back of your design.
What is the advantage of this quick method?
Primarily, it is a rapid and uncomplicated method, serving as an alternative that necessitates less meticulous handling, as there is no need for taping the sheets together.
This grants you the ability to observe the stencil process without apprehension of any lines shifting, as both the final stencil and the design are contained on the same sheet.
However, as mentioned previously, this technique cannot be employed in all scenarios; rather, it should be utilized when tattooing a flat body area with minimal curvature, as the transfer will not be executed on a pliable sheet akin to the one provided in the package.
Reviewing the options, which one to choose?
The traditional manual method is perfect for intricate areas with curves or that necessitate swift adaptability, such as tight spaces. However, it can also be employed for any location as needed.
On the other hand, the expedited manual method is advisable only for flat areas like the back, chest, abdomen, or even the arm or leg, provided the design is not extensive.
We understand that creating a stencil by hand may appear daunting for beginners in the tattooing world. However, with practice and patience, satisfying results can indeed be achieved.
Consider the numerous benefits it offers. As we have emphasized, it helps in developing drawing skills, getting acquainted with the design to be tattooed, and, not to mention, saving a significant amount of money.
Investing in professional materials is undoubtedly advantageous and productive, and we do not deny it. However, everything has its time. Start by mastering the art of hand-made stencils while gradually saving up for digital tools in the future.
It all falls into place, doesn't it?
If you want to learn more about everything that concerns the world of tattooing, enter here and Learn to tattoo like a professional. 10 Masters offer you a guide to accompany you in your professional growth, providing you with all our experience.