Shadings are essential in tattoos. They are responsible for generating depth, volume and that relief look in the design.
In tattooing, as well as in drawing and painting, handling shadows well requires an understanding of light behavior.
But there are many techniques to depict them, and not all styles use the same ones, meaning, different materials are needed.
Keep reading to find out more about it in depth.
The origin of shading in drawing
Nowadays, when we think about a drawing or a painting of tridimensional aspect, what first pops up is shadows. Either knowingly or unknowingly, shadows and chiaroscuros are there and we can’t just separate them.
According to historians, this fine arts tool came up in 5th century BC in Ancient Greece by the hand of an artist called Apolodoro Skiagraphos, who used to paint with the skiagraphy technique, which inspired later painters.
This resource became common after Da Vinci’s selection of charcoal and chalk to create lightning and shadow effects in his paintings. Renaissance painters also gave importance to chiaroscuro to achieve depth and proportion.
Learning to draw through lights and shadows
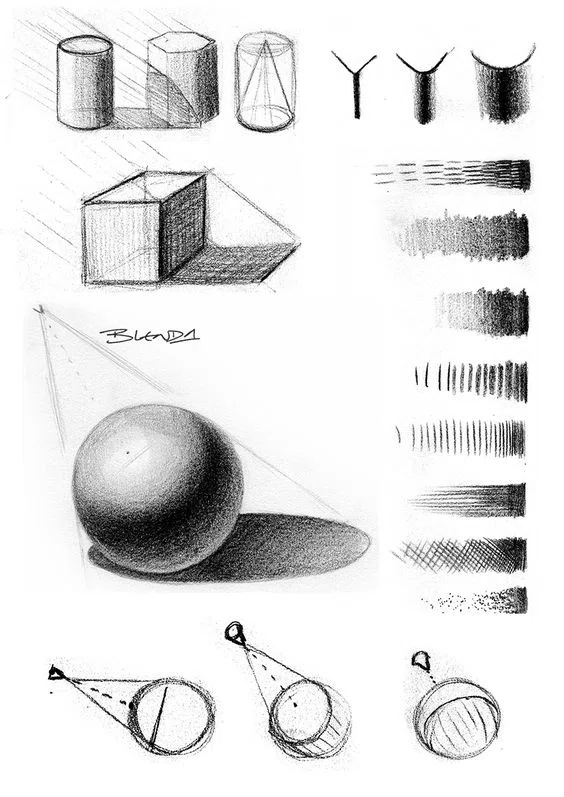
Understanding light is crucial because it helps you visualize tri-dimensionality to translate 3D shapes into 2D designs, alongside its complexity.
Shading adds contrast, details and it enhances some aspects while disguising others. It helps to focus the attention on the strongest points.
Although shading is usually faster than outlining, it is not necessarily "easier".
In tattooing, the tracing or the drawing process differs from that of a sheet, as it usually begins with darker areas, continuing with light colors.
When we draw on paper, we normally start with lighter colors and then gradually work on darker inks.
Likewise, in tattooing, we start by outlining to determine the perimeter of the design, and then move on to the application of color or shadows.
Depending on the design’s complexity, many times it is convenient to tattoo in two sessions: one for linings, and another one to finish setting the drawing. And even a few more could be needed too…
The way light strikes an object is decisive in a design when planning shadows, as it’s what indicates how you should draw the shadows. This is something you should discuss with your client when planning the design.
To practice, we suggest you draw or paint on paper and other supports, and with different tools, either with special pencils for this purpose, such as 2B, 4B, or with pens, paint, and brushes.
Overall, besides practicing with needles, having a foundation in drawing is always beneficial to both your learning process and your performance as a tattoo artist.
Types of shades in drawing
There are numerous ways of handling shades to create different effects, and you could find inspiration in many distinct styles until you find the best one for your tattoos. Let’s see some shading techniques.
- Hatching & Cross-hatching. This shading technique is generated from lines, either in one direction or crossing each other. Here, proximity is the key, because depending on how far or close they are, it will determine more or less luminosity.
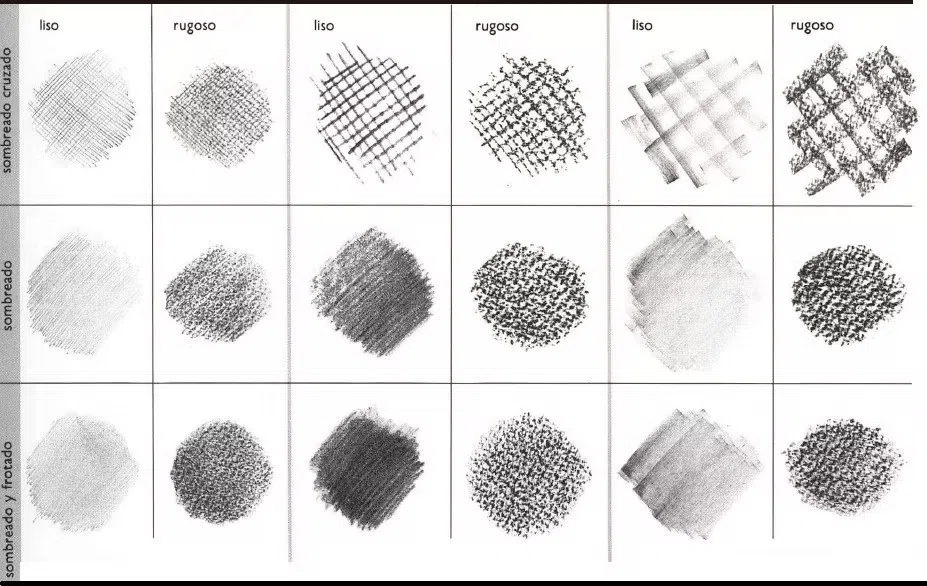
- Scumbling & scribbling. It consists of tracing little circles or scribbles on top of each other without pressing much. Although the result is a quite irregular finished look, it’s still pretty useful for some kinds of drawings.

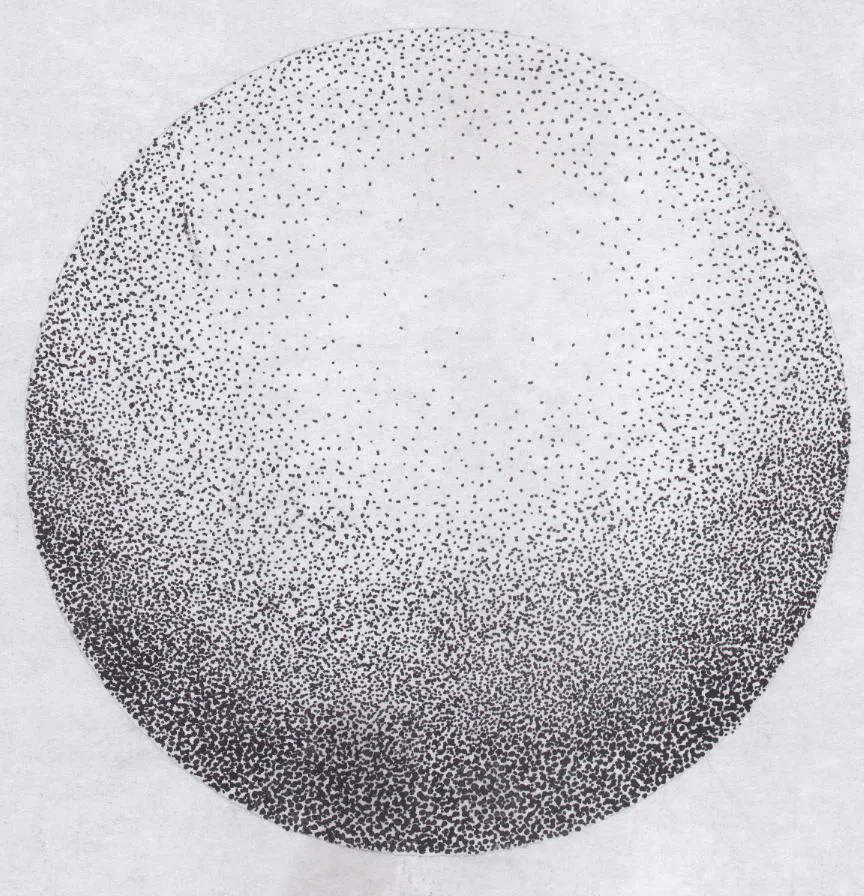
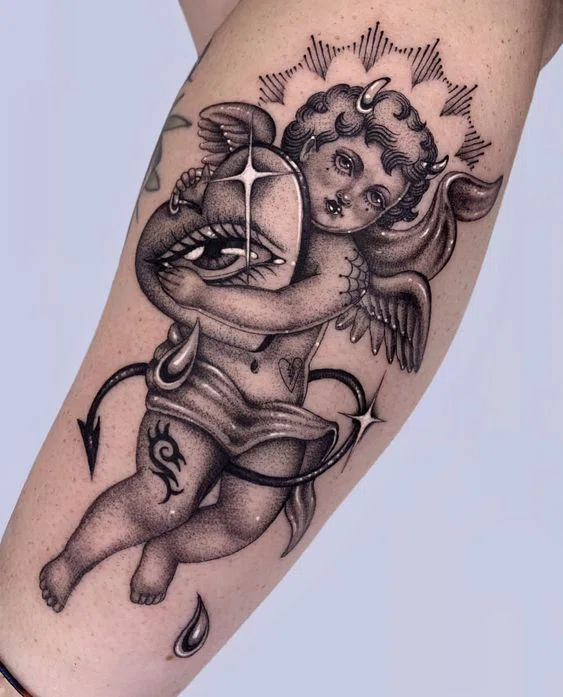
- Stippling & dotwork. A demanding technique that requires patience but can bring very interesting results. Originally developed in painting, but effectively adapted to tattooing, this effect has several application variants. You can either do it dot by dot, or by dragging.
The advantage of the tattoo machine is that thanks to its tapping interval, you can achieve dotwork effects by moving your hand with a certain rhythm and speed. This last dotwork technique known as whip or pepper shading is exclusive to tattooing and is often used in different styles.
- Blending or smudging. It consists of using soft and pliable drawing elements to then blur them with your finger or a piece of cotton.
In tattooing it is achieved through dilutions that generate smooth gradients.
Shading applied to tattooing
To shade tattoos, we recommend that you first practice a lot. A good surface for this purpose issynthetic skin for tattooing.
A frequent concern: what machines should I use? A coil or a rotative machine?
The answer differs depending on what you have at hand. First, keep in mind that coil machines are useful for making one job at a time, it needs to be calibrated every time based on if it’s used for lines or shades.
On the contrary, rotative machines are good for both scenarios, and it’s not necessary to re-calibrate them, which means they are more flexible and adapt better to your work.
Should you want to learn more about them, read our post Types of tattooing machines, where we analyse the particularities of each machine, so you can select the best option for you.
But, let’s get down to brass tacks, what needles should you use and what techniques can you apply when creating shadows?
A needle can be determined in several ways. Depending on how they group, whether it’s round, as in the Round Shader (RS), or lined up, as in the Magnum (M), or Round Magnum (RM), both suitable for creating different effects.
To find out more about needles, visit our post on how tattooing needles are and for what use is each one intended Tattoo Needles Guide.
You should always use needles on their side because if you don’t, you’ll puncture the skin too deeply and you might end up losing that strumming effect that you get when injecting ink in a more superficial way.
This is a crucial aspect to have in mind if you want to have control of the shading effects you want to create.
Once tattooing, begin with the darker zones. And from there, continue with the lighter zones. By changing the pressure, you’ll be able to obtain stronger effects in the darker areas.
Be careful, though. This doesn’t mean you should start with the darkest inks, or press harder and deeper. Instead, you should be filling the area with darker shadows and then the lighter areas with superficial movements.
These types of shades will vary depending on the tattoo style and techniques you work with. For instance, in traditional tattoos, shadows tend to be thicker than in dotwork or realism.
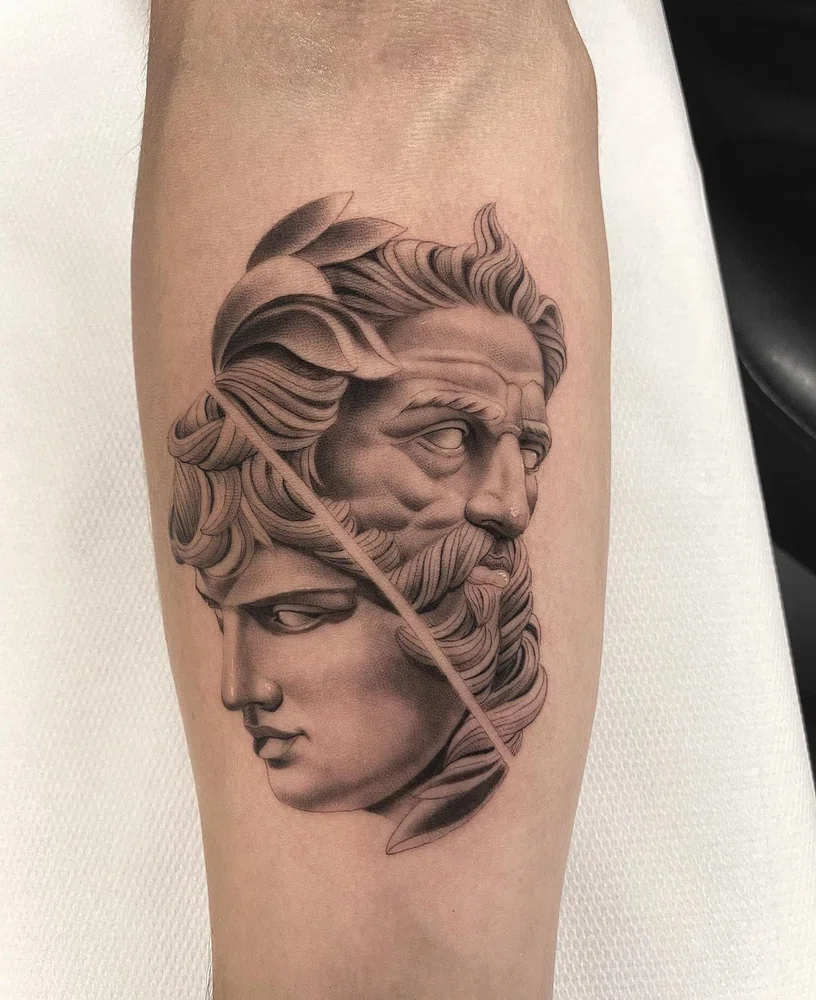
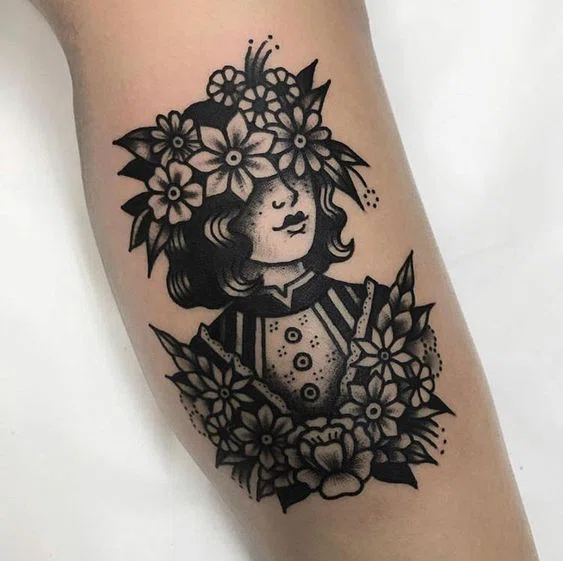
Shades in tattoo
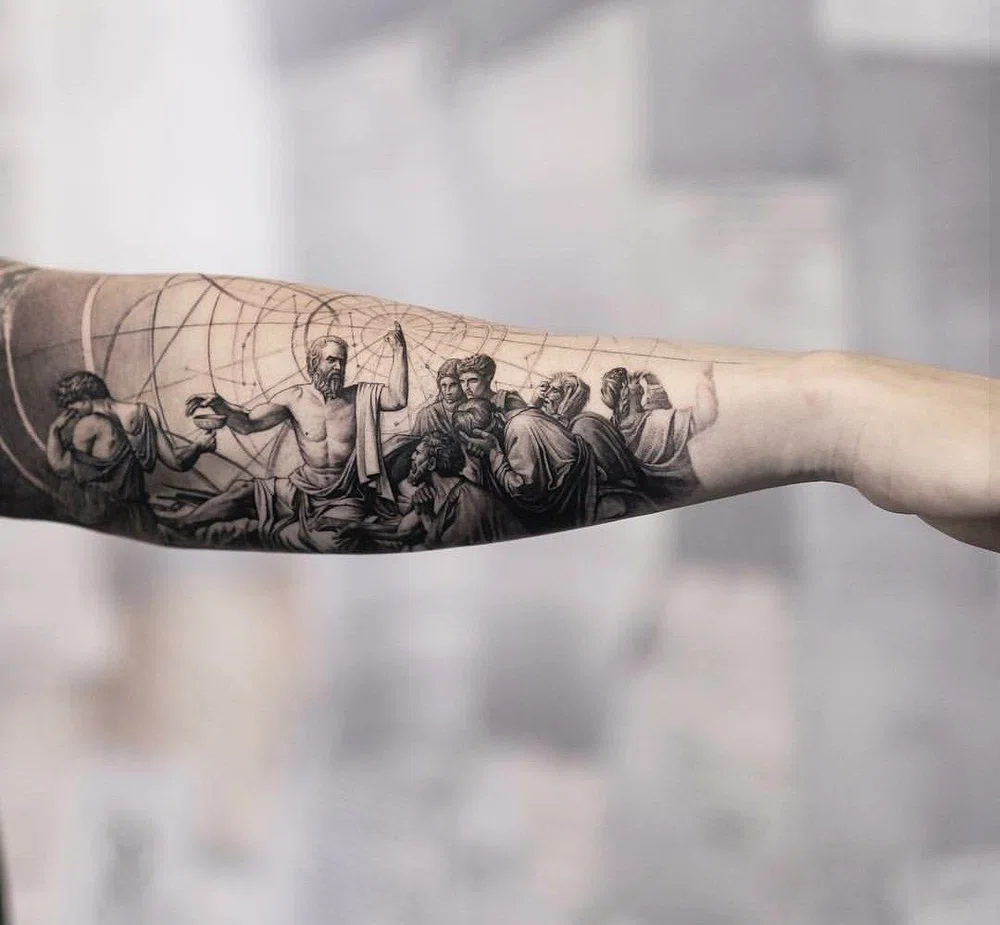
The importance of shades in a realistic tattooing
Realism is complex, and a quite challenging style for any tattoo artist. Mastering the techniques takes time and dedication. It is not impossible but you need perseverance and commitment.
One of the core tasks in Realism is knowing how to make shadows.
Shadows give your design a tridimensional effect. Without them, tattoos would be flat depthless drawing, which could actually be useful for some styles, but never for Realism.
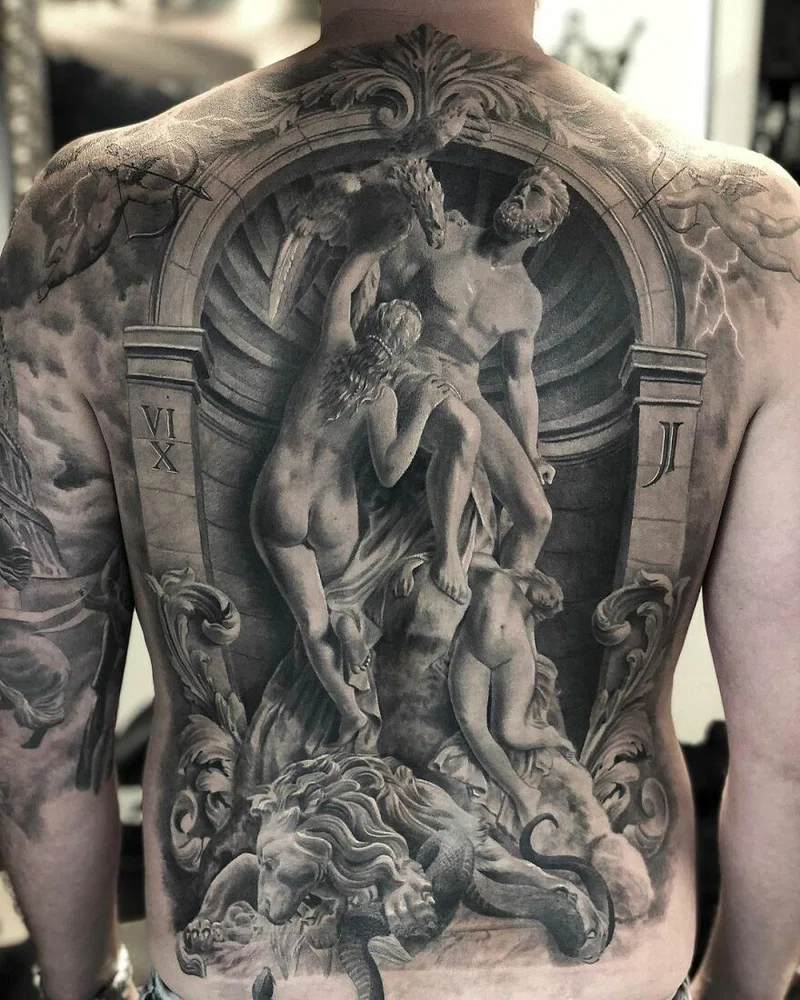
Realistic back tattoo
What is Graywash?
Greywash is a technique where pure black inks are specially diluted to create more fluid shadows.
It is widely used especially in Black & Gray Realism. Many tattooists use 4 ink cups simultaneously to get 4 different shades.
Ink selection will depend on you, but it’s important that you use a specific diluent for this purpose. You can get it in any tattoo shop.
Here's an example of how you could do it:
- The first cup contains pure black, for which you’ll fill it with non-diluted ink. This one is meant to be used at the last shading part, once you have already created your drawing guidelines.
- The second cup is ¾ of black and a third part of diluent. The ink in this case will not be as intense black as the original one.
- Then, the third cup is half black ink and half diluent.
- And, the fourth one is conformed by 25% ink and 75% diluent. You can use this one either at the beginning of the design, or in the areas where you desire to add a final touch of shade, but be careful not to intensify it too much.
Now the question is, can you use more than four tones?
Of course you can! Once you gain more experience, you can learn more on this topic and add as many tones as you consider necessary for the design you’re about to tattoo.
Can you buy the grey wash separately?
Sure! Many brands offer inks already diluted, and it could be helpful for you.
However, we encourage you to first try it as we just taught you so that you understand better how inks behave. That way, you can modify them to your personal taste.
What is the difference between gray wash and gray inks?
This is a very common question... The type of thickness that the gray inks have is greater than what you get with Greywash, so the shadow effects are different. That’s why many artists prefer working with diluted inks, as they give more airiness and wider possibilities in chiaroscuros.
Practice is essential to achieve good shadings
Here are a couple of final tips to help you incorporate this knowledge into your art.
- Take your time.
It sounds obvious, but it’s crucial to understand that enough time and dedication will involve a better finishing look, which requires you tons of concentration. - Practice as much as you can.
If it is to be repeated, so be it! Practising both your drawing & tattooing techniques is key to achieve exceptional shading and be able to comfortably fluctuate between your possibilities. As well as learning how to master the tattooing machines and needles. Do your research and practice a lot. Trial and error! - Never stop drawing.
Keep on practising your technique on paper and other drawing materials. Knowing how to project shadows depending on how light behaves on objects or subjects can only be learnt by observing and practising your drawing.
So, if you’re interested about getting deeper into this topic, we encourage you to do so and always have your notebook at hand. You’ll see your evolution in your tattoo’s results very soon! - Tighten the skin well when tattooing.
It never hurts to remember the importance of this task.
Stretch the skin enough with your free hand as you tattoo; otherwise, ink could get inserted irregularly, which could affect the final result.
This was merely a preview of the most important aspects of the shading technique applied to the art of tattooing, but there is much more to discover!
You can already get an idea of what is involved in adding volume, depth and relief to your tattoos.
Still, if you want to go deeper into the techniques and effects we have mentioned here (among others), the best would be to continue learning from professionals who have already gone through the trial and error phase and who now master this skill to perfection.
But not only that, you will also need to practice a lot until you feel confident and fluent... your ultimate allies to obtain the best possible results.
Good news is that we have an utmost comprehensive course that addresses all this, and more!, from the experience of a Master in Organic Black & Gray Realism that teaches you all the Technique, Methodology and Practice needed to get shadings as subtle as spectacular. MasterCourse: Realistic Tattoo, with Coreh López.